Well, it’s been a little while since I was out in the garage banging away on the airplane.
I have a few things piling up on my list of things to do. Among others, I could have finished up the landing light install, moved on to the left wing rib preparation, etc., but I kind of felt like continuing on with the right wing.
Van’s says that you should do both of the (insert noun here) if you want to save time.
Well, I have time, and don’t need to rush through this.
That means, on to the fuel tanks. The first step is to start removing metal on the Z brackets that hold the tank to the front of the main spar.
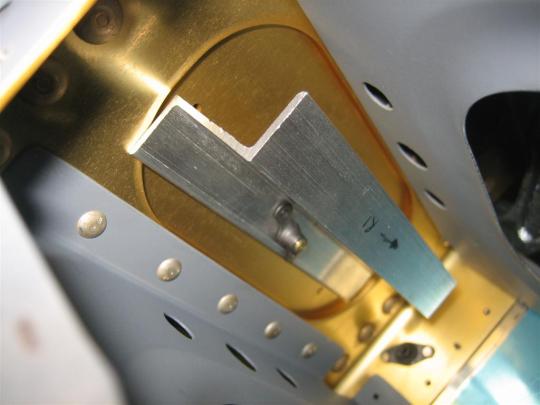
Let’s see, here they are.
Oh, I almost forgot! The ceremonial plans change!
Okay, so there is lot’s of talk about the Checkoway method and what that is, but no one really does a good job of explaining it. I’ll give it a shot, and try to give credit where credit is due.
Basically, Van’s wants you to:
- Install the z-brackets (after some steps to get both sides of them drilled)
- Cleco on the baffle (“back wall” of the tanks) to the z-brackets.
- Cleco the skin to the baffle, then adjust fit as necessary by elongating holes in the baffle.
- Remove the skin and cleco in the ribs.
- Cleco the skin back on.
- Remove the whole thing for matchdrilling off the wing.
The Checkoway method (from what I can tell, because I never actually made it to his site before he took it down…):
- Drill only the aft side of the z-brackets, then bolt them in place.
- Attach a clecoed tank into position
- Drill the inboard baffle-to-z-bracket holes (doing this now, instead of before, ensures the tank is perfectly aligned.)
- Remove the leading edge to drill the outboard baffle-to-z-bracket holes
- Remove skin and ribs, leaving baffle in place.
- Now finish baffle-to-z-bracket holes.
The Checkoway method basically has you wait until you ensure propoer tank alignment before starting to drill holes in the front flanges of the z-brackets. If you do it Vans’ way, you might misdrill a z-bracket, and it will throw off the whole tank alignment.
Anyway, many sites have kind of hinted at this stuff, but Ethan really spelled it out nicely, and I have to give him some credit.
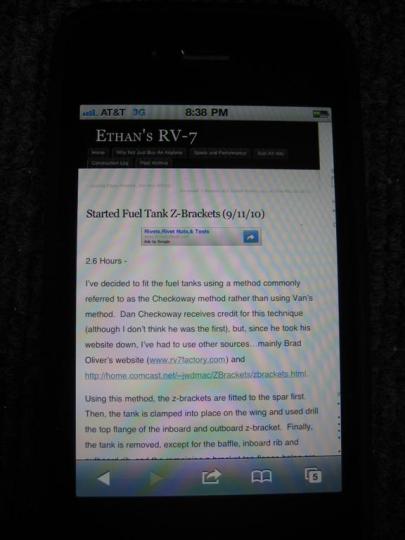
Of course, I’m out in the garage, so iPhone saves the day.
Okay, as part of this whole Checkoway method, one of the suggestions is to move the “centerline” (future drilling reference) of the z-bracket flanges to favor the type of fastener you’ll use later.
On the inboard-most bracket, you primarily use a socket to tighten or loosen bolts from the wing root. Hence, you should move the centerline (and resulting holes) AWAY from the web for better socket access.
On the other 6 brackets, the spar attachment is from the rear spar, so there are no access issues, but the front flange needs a blind rivet, so if you move the holes CLOSER to the web (allowing for enough room for the nutplate), then the whole thing slides over and there is more room for your blind rivet puller during final tank construction steps.
(I spent an hour in the garage tonight, and most of that time was just trying to wrap my head around this idea.)
Once I had it all sorted out, I laid (layed? Emily, which one is it?) the z-brackets out and started marking them with really obvious arrows.
After some really precise (HA!) line drawing. I finally used my center punch to mark a good starting point for my #12 drill. (#12, because that’s the holes size for AN3 bolts.)
After drilling the second one (actually, I checked before drilling, but didn’t snap a picture till after), I held a nutplate over the hole to make sure I didn’t get too close.
Then, I needed to bolt these in position to drill the other 2 (of 3) holes. I spent a few minutes removing the lower inboard right wing skin and laid (Emily!!) the brackets in position.
Okay, I have my centerline and a hole. Let’s bolt them up. (I added tape and a washer for spar-protection.)
Everything was going fine until I got to the inboard bracket. This doubler prevented me from getting it snugged up.
So, I just moved it to the top side, knowing I’ll have to backdrill from underneath. No biggie.

See, worked great. (You can see I used sacrificial nutplates, instead of regular nuts...easier to tighten since once you get it started you don't have to hold the nut.)
Back to the outboard brackets…
I’d drill the top hole, stick an AN3 bolt in, then drill the bottom hole.
After all 7 were matchdrilled. I headed inside.
1 hour. It was basically 45 minutes of staring at the plans, the instructions, and other builders’ sites, then 15 minutes of marking and drilling.
With the start of the tanks, I need to start thinking about ordering some Black Death (Proseal (tank sealant). I used this stuff on the rudder, and it really wasn’t that bad. I’m just calling it Black Death to be funny…or at least conformist.)
I can’t decide if I’m going to order the quart, or a whole bunch of the smaller tubes, which are easier to work with, but more expensive.


Laid is right – thanks for the shout-out!! xoxo