Well, after an exiting morning with the South Carolina Breakfast Club, I was fraught with motivation. (I don’t know if I am using “fraught” correctly…)
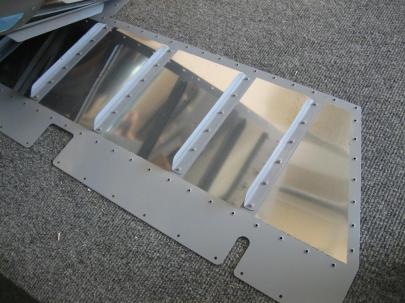
Next thing on my long laundry list of things to do on the left elevator is to prep the skin for riveting to the skeleton. First thing, I got out the soldering iron and pulled off some more of the blue vinyl. While I was at it, I pulled off the blue painter’s tape I had been using to protect the back-riveted stiffener rivet lines.
Then, on to deburring. I deburred both exterior sides of the skins, and then moved on to deburring the interior of the skins. I follow very closely with my maroon scotchbrite pad to help me remember where I have deburred (you can easily tell the difference between a deburred hole and one that has yet to be deburred…I am more using the scotchbrite pad as an excuse to give my fingers a rest…it is hard spinning that drill bit over and over and over).

The background holes are #40 (3/32") and the foreground holes are #30 (1/8"). I drilled these holes to #30 now because I don't want to wait until after the skin bending (at which point I won't be able to deburr them). Also, having the holes to final size will help with the annoying pop rivets that go in them.
Next up, dimpling the skin-to-skeleton holes. I scuff the interior of the skins before dimpling, because it is easier to scuff without dimples getting in the way.

I use my masking tape trick on the male dimple die, and I get ZERO circles around the dimples. So nice.
Time to move on to edge-finishing. This little 90° corner is a tough one, but I think this ended up nice.
After edge-finishing, I cleaned up, wiped everything down with MEK, and primed. Fast forward 30 minutes later, and now I get to pull the vinyl out of the skins (I’m trying to remind myself constantly to not forget the RTV in the trailing edge of the elevator bend before riveting.)

I probably add some time to the project by masking all of this stuff off and priming just the contacting surfaces, but I think it looks great (no one will ever see it) and I think I'm saving weight. Maybe not, but I sleep better because I do this.
Last, but not least for the day was to prep and prime the two outboard ribs. These fit back to back and support the counterbalance and counterbalance skin.
3.5 hours today on the project, but I’m only logging 3.0 here. See here for the other 30 minutes.


