First thing after breakfast, I snagged the two VS spars and the spar reinforcement and headed into the kitchen to finish some surface prep. After about an hour, I had all three pieces scuffed up, cleaned, and back outside. Here is a shot during scuffing. You can see the top half has been scotchbrited and the bottom half is the raw part after removing the blue vinyl.
Here’s the spar reinforcement before finishing.
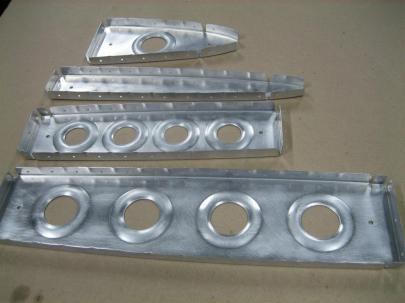
All three after scuffing. (Along with the ribs from last night.)
Then, I bent the rib flanges to exactly 90 degrees using my new hand seamers, and fluted the ribs.
I started clecoing the rear spar doubler to the rear spar, and then realized they want you to put the hinge brackets in now. I quickly located VS-410PP, VS-411PP, and VS-412PP, and got the Goo Gone out to help pull these stickers off.
While I waited for the Goo Gone to do its magic, I decided to start clecoing the front spar and ribs together. You can also see the rear spar and rear spar reinforcement in the upper left corner of this picture.
Then, I clecoed in the rear spar. Here, you can also see the hinge brackets waiting for the Goo Gone.
Finally, I clecoed in the root ribs (fore and aft).
Then, I cleaned off the hinge brackets, got them clecoed to the rear spar, and clecoed the rear spar to the front spar and ribs.
I followed Mike Bullock’s advice and clamped the rear spar to a couple of 2x4s. This let me matchdrill the rear spar vertically, which helps a lot with getting a perfectly straight hole.
Here’s my process. Cleco every other hole, match drill, mark the drilled hole with a dry-erase dot, move the clecos, repeat. Here, you can see my dots.
After finishing up the ones you can reach from the aft side of the rear spar, I flipped the whole assembly over and match-drilled the two remaining holes (that aren’t drilled in the upper half of the lower set of hinge brackets).
Next, we get to cleco on the skin, wuhoo!
Then, time to matchdrill the skin to the spars and ribs. Same process here. Cleco every other hole, drill, mark dots, move clecos, repeat.
Here, you can see that I am in the middle of moving clecos. The one in the center of the picture gets moved one left (into the marked, already drilled hole), then the one to the left of that gets moved one left, and so on.

Example of brand new cleco on the left, and two used clecos in the middle. Eh, they work just fine, they're just not as pretty.
I got the left side of the vertical match-drilled, then flipped it over, took this picture, and then headed inside.
3.0 solid hours today. Good work all around.


